10/31/2025
Transplanting Best Practices
W. Garrett Owen
As spring production gets underway, greenhouse growers face the crucial task of transplanting plugs and liners. This process, while seemingly routine, can significantly impact crop quality, uniformity and overall production success. Proper transplanting techniques are essential for minimizing transplant shock, promoting rapid establishment and ensuring healthy plant growth.
This article outlines best practices for each step of the transplanting process, highlighting the potential consequences of overlooking these critical details. By following these guidelines, you can set the foundation for a successful spring crop and avoid common pitfalls that lead to plant stress, uneven growth or crop losses.
Pre-transplant preparation
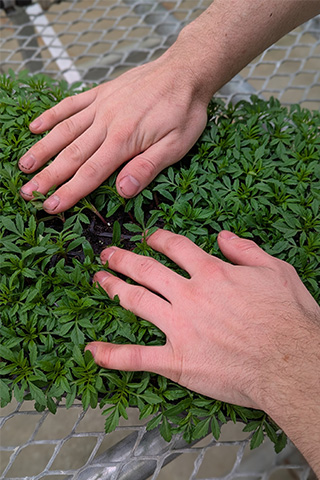
Pre-transplant preparation is a critical first step often overlooked in the transplanting process. Upon arrival, inspect all plugs and liners for signs of damage, pests or diseases (Figure 1).
Set up a quarantine area to keep new plant material arrivals separate from other shipments and from plants in production. This crucial step ensures that only healthy plants are introduced into your production system, reducing potential losses later in the crop cycle. If plants have been shipped, allow them to acclimate to your greenhouse conditions for 24 to 48 hours before transplanting. This period helps reduce transplant shock and improves establishment rates. Additionally, pre-irrigate plug trays two to three hours before transplanting. This practice facilitates easier removal of plugs from the tray and significantly reduces the risk of root damage during the process.
 Removing plugs & liners
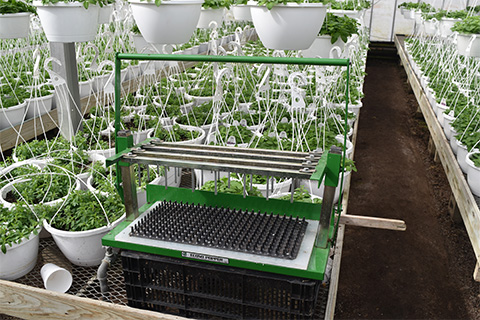
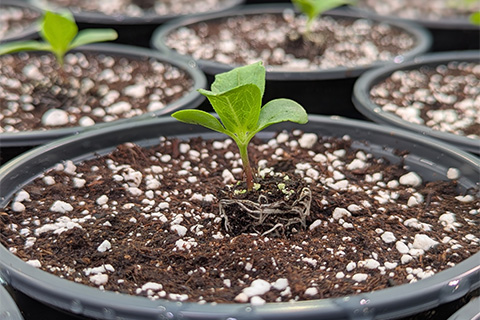
When removing plugs or liners from trays, gentle handling is paramount to preserve the integrity of the young plants. Use a dibble board, plug popper (Figure 2) or handheld tool (Figure 3) to loosen tightly rooted plugs from the bottom of the tray, as this minimizes root disturbance.
Never pull plants out by their stems, as this can cause damage (Figure 4), potentially leading to plant death or severely stunted growth.
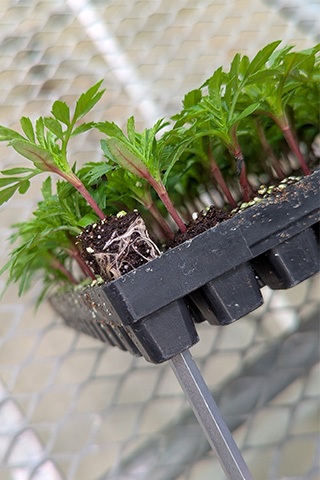 If roots are torn during removal, the plant’s ability to uptake water and nutrients is compromised, resulting in transplant shock and delayed establishment. In severe cases, damaged roots can become entry points for soil-borne pathogens, further jeopardizing plant health. Take care to remove plugs when the substrate moisture is at an optimal level—too dry and the root ball may crumble; too wet and it may fall apart, exposing delicate roots.
Handling & staging
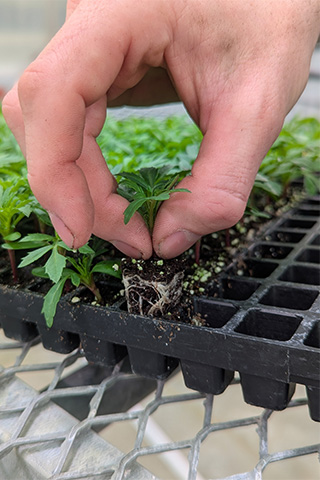
Once removed from the tray, handle plugs and liners with care, always supporting them by the root ball (Figure 5).
Avoid touching the foliage or stem, as these tender parts are easily bruised or torn. Even minor damage to leaves or stems can disrupt the plant’s ability to photosynthesize efficiently and maintain proper water balance. This mishandling stress can delay establishment, increase susceptibility to diseases and result in uneven crop growth. If plants must be staged before transplanting, minimize the time they spend out of the growing media.
Extended exposure of roots to air can cause rapid desiccation, especially in low humidity environments or under direct sunlight. This drying out of roots can significantly reduce survival rates and lead to a need for extensive crop replacement, increasing labor costs and reducing overall production efficiency.
 Optimizing workstation layout
Optimizing your transplanting workstation layout can significantly improve efficiency and reduce the risk of plant damage. Design ergonomic workstations that minimize repetitive motions and reduce the distance workers need to reach for materials and supplies. One method is to pre-fill containers and arrange them on pallets or at bench level in the greenhouse (Figure 6).
Another option is investing in pot filling and transplanting equipment that can be easily moved in and out of the greenhouse. I’ve seen different transplanting equipment suitable for different operation sizes that significantly improved consistency in planting depth and spacing while reducing manual labor and potential human error. One example included a mobile transplanting line designed to fill flats, brush excess substrate of the top and dibbled transplant holes so staff could easily insert plugs (Figure 7).
Substrate preparation & container filling
Preparing the new containers with a properly moistened substrate is a critical step that sets the foundation for healthy root development. Ensure the substrate moisture is evenly distributed throughout the cell pack or container to create a uniform growing environment. Uneven substrate moisture distribution can lead to localized dry spots or over-saturated areas, both of which impede proper root growth.
 If the substrate is compacted too tightly, it restricts root growth and reduces the air-filled porosity necessary for healthy root respiration. Overly compacted media can lead to poor drainage, potentially causing root rot and creating anaerobic conditions that favor pathogen development.
Conversely, if the substrate is too loose, it may not retain enough moisture, leading to frequent wilting and nutrient deficiencies. Strike a balance by gently filling containers and creating an appropriate-sized hole for the incoming plug or liner.
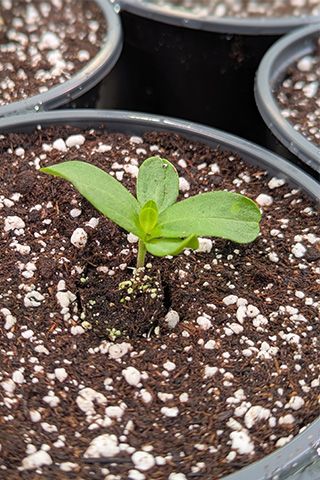
Planting depth & technique
Planting depth is an often-overlooked factor that can have profound effects on plant health and development. 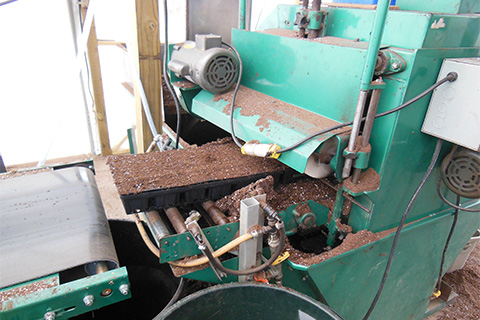 Always aim to transplant plugs and liners at the same depth they were growing in their original trays (Figure 8).
Transplanting too deep (Figure 9) buries the stem tissue that isn’t adapted to high moisture environments, potentially leading to stem rot caused by soil-borne pathogens. This can result in plant collapse and significant crop losses.
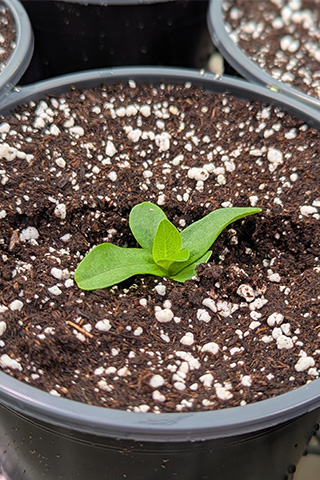
 On the other hand, planting too shallow (Figure 10) exposes the upper portion of the root ball to air, causing desiccation of fine root hairs crucial for water and nutrient uptake. Shallow planting can also lead to instability, with plants more likely to topple over as they grow larger.
Pay close attention to each plant’s original substrate line and maintain this level during transplanting to ensure optimal growth conditions. Keep in mind that some crops, such as tomatoes, can benefit from deeper transplanting, while others may require other specific considerations.
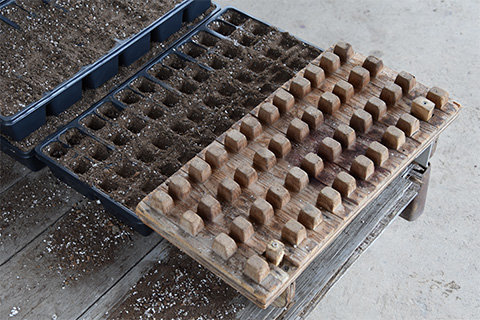
Growers can utilize various equipment to dibble holes into flats, containers and hanging baskets. Dibbling equipment may be manufactured or hand-made. These pieces of equipment can significantly improve consistency in planting depth and spacing, while reducing manual labor and potential human error. A couple of these items I’ve seen at different operations range from dibbling workstations to flat-sized wooden dibble boards (Figure 11) to round dibble boards.
Ensuring root ball contact & initial watering
Ensuring full contact between the substrate and the root ball is the final critical step in the transplanting process. After placing the plug or liner in its new container, gently press down on the surrounding substrate to eliminate air pockets. These voids, if left unchecked, can cause localized drying of roots, hindering water and nutrient uptake. Poor root-to-substrate contact can result in uneven growth across a crop, with some plants growing while others struggle to establish.
 Immediately after transplanting, water thoroughly to settle the substrate and further improve contact. This initial watering is crucial for kick-starting root growth into the new substrate. Skipping or delaying this step can leave plants vulnerable to water stress during their most sensitive establishment phase, potentially leading to stunting or plant death. Be mindful of water quality and temperature, as cold irrigation water can shock roots and slow establishment, while poor quality water can introduce pathogens from the start.
Post-transplant care
Post-transplant care is crucial for ensuring successful establishment. Implement a cycling irrigation strategy to balance moisture levels without over-saturating the media. Apply fertilizers at appropriate rates to support early root establishment, but be cautious not to over-fertilize, which can lead to soluble salt (EC) burn. You should carefully manage environmental factors such as light levels, temperature and humidity to minimize stress after transplanting. For certain crops, consider using plant PGRs or fungicide drenches either pre- or post-transplant to manage growth or prevent disease, respectively.
Quality control measures
Implement quality control measures throughout the transplanting process. Regularly check for proper planting depth, ensure good substrate contact with root balls and monitor for uniformity across the crop. These checks can help identify and correct issues early, preventing widespread problems later in crop production.
 By meticulously following these expanded best practices, you can significantly reduce transplant stress, promote rapid and uniform establishment, and set your spring crops on a trajectory for robust growth and high-quality production. The attention to detail during this critical transplanting phase pays dividends throughout the entire production cycle, resulting in healthier plants, reduced crop losses and, ultimately, higher profitability.
Remember, successful transplanting is not just about the physical act of moving plants from one container to another—it’s a comprehensive process that begins with preparation and extends through post-transplant care, all aimed at giving your crops the best possible start.
 This article was previously published in the e-Gro Alert newsletter. GT
W. Garrett Owen is Assistant Professor and Extension Specialist, Sustainable Greenhouse and Nursery Systems, for The Ohio State University.