9/1/2018
Root Reading
Luís Muñoz
Have you ever examined a liner and asked yourself, “Is this ready for transplant?” Or, “How do I produce the best rooting possible?”
After so many years of experience rooting, transplanting and growing plants, you may find yourself not taking the time to examine your liners like you used to. Sometimes you can recognize a liner is ready for transplant just by looking at a tray and guiding yourself on years of experience. You already know verbenas tend to root a little faster than lantanas. And crops like impatiens and coleus are extremely fast to root when compared to a geranium. So how would you explain to an employee the best way to examine the roots and determine if they’re ready for transplant?
Getting the best roots
Typically, a well-rooted liner looks healthy, growth is adequate and the plant will quickly grow once established. At times, some growth control is needed, whether it’s with PGRs or environmental control. Chances are if you find yourself making changes to control and inhibit growth, there’s a healthy root structure. Other times, it could be the total opposite and the environment is controlled to increase rooting and growth—whether it’s a temperature increase, bottom heat or even the change of rooting medium.
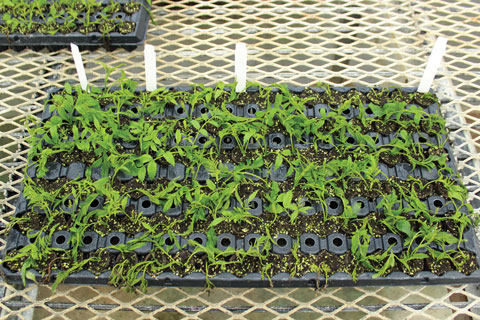
Figure 1. Dead and wilted cuttings.
Under our rooting conditions and excellent weather in California, most of our annual unrooted cuttings (URC) stuck in 25-mm liners (102 tray) see full rooting in about four to six weeks. Rooting will vary depending on crop. When it comes to rooting, I like to think of it as a five-step process to successfully root a liner that’s ready for transplant. Any of these five steps will have an impact on your rooting and will help you analyze roots in a better way.
Step One: Examine your cuttings and make sure they’re nice and healthy. Anything that looks damaged, wilted or unhealthy is bound to cause headaches down the road. If it dies in propagation, it’s trouble waiting to happen and it will be one dead cutting sitting in wet, moist conditions and one more plant you’ll have to replace (Figure 1). Verify that cuttings are uniform, not budded, and to spec size. All these factors will play a key role in successfully rooting.
 Step Two: Assure yourself that unrooted cuttings are stuck correctly. It may seem like a simple task, but you’ll be surprised. I’ve examined liners that look like they’re struggling or not doing too well, and many times, after cutting a liner in half, I find the cutting wasn’t stuck deep enough, the dibble was too large, or I pull the liner out and I can see the bottom end of the cutting from the other side (Figure 2). It’s important to stick correctly, at adequate depths, and ensure the cutting is making full contact with the media to reduce any transpiration and allow maximum moisture until roots begin to form.
Figure 2. A large dibble leaves room for the bottom end of the cutting to stick out.
Step Three: Did you remember to apply rooting hormone before sticking or plan on making a post-stick application? Many times, rooting hormones aren’t required; normally under ideal conditions, you may find most crops root fairly well. But the use of rooting hormone applications will promote faster rooting and increase uniformity. Depending on your practice, there are different forms of rooting hormone (powder or liquid) and methods to apply. Two common forms of rooting hormone I see often used are applied to the stems before sticking (Figure 3) or liquid foliar spray applications after stick.
Figure 3. Using 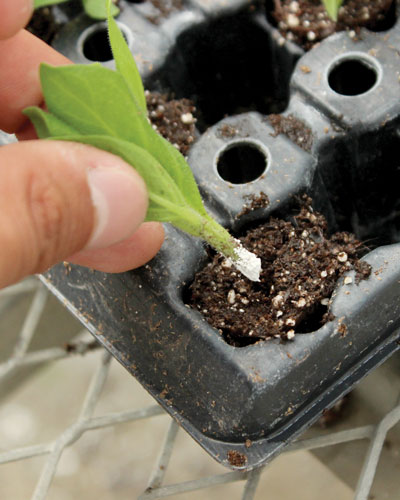 rooting hormone.
Step Four: Confirm the propagation system is fully functioning and dialed in for your crop and rooting media. If you’re working with bottom heat, verify it’s working. Sometimes this can be done by examining temperatures from a control center, but it’s always nice to walk into a propagation zone on a cold morning and feel the warmth.
Adequate misting is critical. Remember, there are no roots on these plants, so mist is their temporary life support. In the first few days, ensure they have plenty of mist to reduce transpiration. You don’t want to dry them out. As the days progress, misting should slowly be reduced. Having liners and media saturated with water is not ideal. Not only do roots need oxygen for growth, but having wet media for too long will promote algae, bacterial growth and pests. You may find yourself having to apply more fungicide and pesticides than needed to control those pesky fungus gnats.
Step Five: The reward! You should see small plants starting to harden and possibly grow three to four weeks after sticking. Lightly tugging and carefully pulling on the cutting is a good way to examine whether roots are beginning to develop. You don’t want to pull too hard and rip any roots forming. Remember, initial roots are small and weak; a slight tug is enough to feel whether there’s pressure beginning to build. This is a good indicator roots are beginning to form.
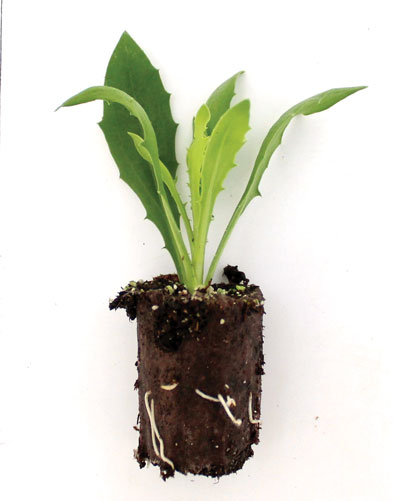 Figure 4. Roots emerging.
Grabbing the liner by the edges and pulling it out is another great way to better examine roots. Once one or two roots begin emerging at the edge of the liner, roots are developing and should have enough strength to move out of propagation and acclimate to their new growing environment (Figure 4).
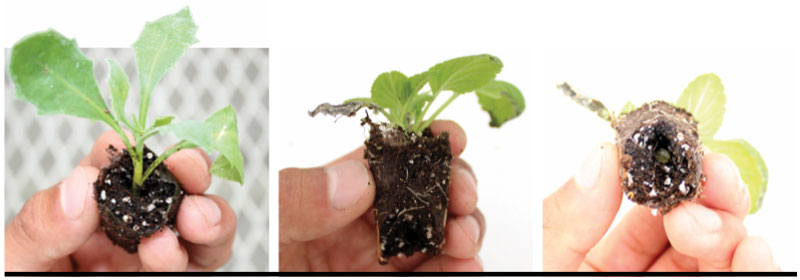
Once out of propagation, as a grower, you want a nice and healthy rooted liner—something that not only will grow well, but that will be easy to work with. You don’t want to spend time carefully pulling out a liner that has weak roots. You want a strong and sturdy liner, with fully developed roots, that feels comfortable grabbing by the stem and pulling out of the tray without the fear of damaging it (Figure 5). Not only will this make shipping, handling and transplanting much faster, but you can transplant with confidence knowing you have a fully-developed liner that will root well into its final container.
Achieving these steps will maximize liner and root quality. What’s the perfect rooted liner that’s ready for  transplant again? It’s a liner that has a healthy root structure. Roots look white and healthy, they’re not too juvenile or too mature, and roots have nowhere else to grow so we begin to see that ring/crown form at the bottom of the liner. They’re right in the middle, where they can be easily handled and continue their growth in a new container to grow into a fully grown and healthy, mature plant. GT
Figure 5. Developed liner (left) and the perfect liner (right).
Luís Muñoz is Culture Research Technician for Ball FloraPlant in Arroyo Grande, California.