11/27/2015
Grow Your Own Mealybug Destroyers
Rob Maganja & Dr. Matt Taylor
Mealybugs are pests that can be problematic during greenhouse production and considerably worse in conservatories where plants have indefinite lives. At Longwood Gardens,
Cryptolaemus montrouzieri—better known as the Mealybug Destroyer—is reared to be used as a biological control organism against certain mealybugs. Mealybugs are whitish-gray, a few millimeters long and notorious for creating large quantities of honeydew on the leaves below where they’re feeding. As with several pest insects, mealybugs have a piercing-sucking mouthpart that allows them to ingest plant sap from a leaf or branch. Excess sap is excreted from the mealybug’s posterior, and after falling to the leaves beneath, black sooty mold begins to grow. Additional signs of mealybug infestation include drooping, yellowing leaves and early flower and/or fruit drop.
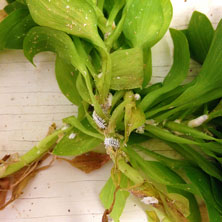
Pictured: Mealybug destroyer larvae eating adult and juvenile mealybugs.
If the number and size of plants infested with mealybugs is small, mechanically removing infested plant material or using a cotton swab dipped in rubbing alcohol to wipe infested areas can remedy the problem. If these methods become too tedious, chemical control can be used. However, for a more environmentally friendly pest management solution, Mealybug Destroyers can be just as effective as insecticides.
Benefits of raising your own Mealybug Destroyers
As sustainability becomes more important in horticulture, the prospect of using Mealybug Destroyers and other biocontrol means is a surefire marketing technique—after all, what customer or garden visitor wouldn’t be impressed by plants that are raised in a biocontrol program? The initial cost of using Mealybug Destroyers is steeper than using insecticides, but in time, the beetles should become self-perpetuating. Regular application of the beetles to the affected crop is necessary for four to six weeks, but then fewer applications of beetles is necessary, unless the Mealybug Destroyers are killed off through the use of biocontrol-unfriendly insecticides.
By raising your own Mealybug Destroyers, the cost savings over buying the beetles from an insectary is tangible. The inputs for the rearing system are reasonably inexpensive, and though you’ll need to continue buying beetles from an insectary to ensure high genetic diversity in your beetle population, you’ll only need to do this once a month. Without your own rearing system, you’ll likely need to order Mealybug Destroyers every one to two weeks.
What you need to raise your Mealybug Destroyers
- Pesticide-free plant material infested with mealybugs
- Three vases of water
- Plastic wrap
- Rearing chamber made of wood with one wall made of clear plastic (for viewing purposes) and a hinged top panel also made of clear plastic (for light)—the whole enclosure should be a minimum of 1 cubic foot; no screen is necessary.
- Fluorescent light with timer (doesn’t need to generate heat as long as the chamber temperature is 70 to 78F [21 TO 25C]; a 12-hour day/night cycle is ideal for both beetle growth and egg developments).
- Sponge
- 7 small dishes (3 for Stage II, 3 for Stage III and 1 for a sponge)
- 20 Mealybug Destroyer adults to start the colony
- Add four to eight adult Mealybug Destroyers from your supplier to the rearing chamber (to promote high genetic diversity) once a month; this should cost about $2 to $4.
Rearing protocol
When first creating your Mealybug Destroyer rearing chamber:
1) Place mealybug-infested plant material into vases (Stage I) of water with the opening covered with plastic wrap (to prevent beetles from drowning in the water). At Longwood, we typically use alstroemeria, artemesia, begonia and chrysanthemum.
2) Put the beakers into the rearing chamber with a growing light.
3) Dampen the sponge and place it on one of the dishes (this adds humidity).
4) Three small dishes should be labeled “Stage II” and the remaining three should be labeled “Stage III”—these are reserved for additional plant material and allow beetle eggs two weeks to develop into naked eye-detectable larvae following the plant material’s removal from the vases.
5) Add 20 Mealybug Destroyers to the rearing chamber.
Once a week, the following steps should be taken:
1) Remove vases containing plant material, individually, and carefully comb through each to look for adults. Place adults in a covered container. Be careful—the beetles are very fast.
2) (First week only) Evaluate the plant material in the vases. If any is yellowing, browning or wilted, remove it from the vase and place it into a “Stage II” dish after discarding any moldy or malodorous plant material. Place a fresh piece of infested plant material into the vase.
3) (Second week only) Evaluate the plant material in the “Stage II” dishes. Count up the Mealybug Destroyers in this plant material and then move all the plant material to the “Stage III” dishes. Clean and dry the “Stage II” dishes. Next, evaluate the plant material in the vases as per step 2.
4) (Third week onwards) Evaluate the three “Stage III” dishes and dispose of plant material after pulling out any beetle larvae, pupae or adults. Dishes should then be cleaned and dried.
5) Evaluate the three “Stage II” dishes. If there are more than 20 individuals (adults and larvae) between the “Stage III” and “Stage II” dishes, the population should be divided between release and rearing—half the population should be used for release and the other half returned to the rearing chamber. But if there are less than 20 individuals, don’t release any to allow the population time to develop further. Be sure to record total numbers of adults and larvae for population tracking purposes.
6) Following the evaluation, this plant material should be placed in the “Stage III” dishes. Dishes should then be cleaned and dried.
7) Check the floor and sides of rearing chamber for larvae and place them in “Stage II” dishes. Clean the chamber thoroughly with soap and water.
8) Remove any moldy or browning plant material and refresh water in beakers.
To make sure enough mealybug-infested plant material is always available, create one or two additional chambers for infested plant material. Having multiple sets of mealybug-preferred plants growing at all times is ideal to ensure a steady food supply for the Destroyers.
How to measure impact of released beetles
Weekly scouting is essential to determine the effectiveness of the Mealybug Destroyers. Take good notes every week on both mealybug and Mealybug Destroyer populations and compare these numbers routinely. If you have the “luxury” of having two mealybug-infested greenhouses/conservatories, you can directly compare the biocontrol location to another type of control. You’ll begin to see an obvious decline in mealybugs in four to six weeks, and then, as long as Mealybug Destroyer numbers stay high, the mealybug numbers will remain low. Add Destroyers as necessary and expand your rearing program according to your needs.
GT
Rob Maganja is currently a Horticulture Seasonal at the Holden Arboretum in Kirtland, Ohio, and was Integrated Pest Management intern at Longwood Gardens during this past summer. Dr. Matt Taylor is Research Manager for Longwood Gardens in Kennett Square, Pennsylvania.
Works Cited
Cunningham N. 2002. “Producing Cryptolaemus montrouzieri
Eggs and Larvae.” Minnesota Department of Agriculture.
Morales-Ramos J, Rojas M, Shapiro-Ilan D, eds. 2013. “Mass Production of Beneficial Organisms: Invertebrates and Entomopathogens.” Saint Louis (MO): Academic Press.