4/1/2018
Eyes Mandatory, Degree Optional
Sylvia Schaap
When the cool, rainy weather of late fall and early winter rolled around, insect scouting slowed down dramatically. Instead, the little grower’s office was packed with diseased plants waiting for diagnosis.
Evil spores trooped determinedly through the wetness to lay siege on sluggish plants … mayhem seemed to reign in the plant world.
While some of the diseases we could identify by the symptoms (hello, botrytis), lots of diseases look the same on the plant. At least to me.
Google Images and descriptions for symptom-based ID can be helpful, but they aren’t necessarily a positive identification. When I read a symptom description—“brown lesions, foliage discoloration, leaf and stem necrosis, and eventual death of entire plant”—many possibilities come to mind, including abiotic disorders. These descriptions are vague and general because one pathogen could show symptoms and progression differently on another species, variety or during different weather conditions.
Since symptoms aren’t foolproof, we must be our own sleuths. Luckily, most fungal diseases produce distinguishing structures, like kids leave fingerprints, which is why I like having a microscope in the cupboard. Those contraptions don’t belong only under the eye of scientists or in a lab; even though you may look like a real nerd peering into one, they can be extremely useful to your everyday, average, dirt-under-the-nails grower.
Under the lens
The microscope has definitely been a great addition to our IPM toolkit. I like knowing what we’re dealing with so we can make informed and responsible decisions on necessary cultural changes or what exactly to spray for. With a microscope and a little help from Google, we ID a lot of things on-site. With those internal results, issues can be addressed specifically and more quickly.
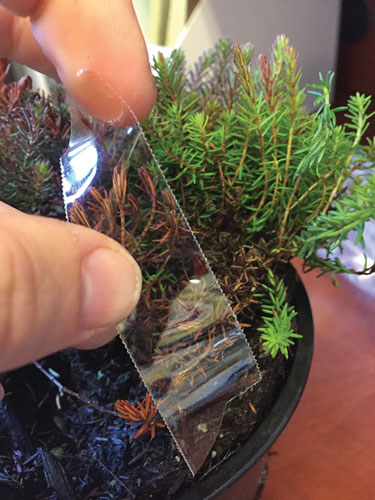
Pictured: The easiest way to try and identify a disease under a microscope is to use clear cellotape, which you stick onto the diseased plant part, rip off and repeat.
Besides diseases, there are plenty of really tiny things going on in and affecting your crop—insects, their eggs and juvenile stages, mites, stomata, disease spores, hyphae, nematodes—and all these can be seen under the lens.
Labs that offer identification services are a great resource, as they’re filled with high-tech gadgets and employ skilled professionals that can guarantee an accurate diagnosis. Some can even do DNA analysis, giving you results right down to the species level.
If you do attempt to identify diseases yourself rather than sending it to a lab, you’ll end up with one of two results: 1) You successfully identify the disease; or 2) You can’t and send it to the lab
anyways. But if you succeed even three times out of five, the saved lab fees very quickly pay off the cost of a good microscope.
I love microscopes because they’re a practical instrument of science that you don’t need a degree to use or to get good use out of. Plus, they don’t have an expiration date and will never be useless (unlike last year’s edition of an outrageously expensive, required textbook).
For a lot of fungal foliar and root diseases, doing in-house disease ID is as simple as a piece of tape, a slide, Google and all those notes from grower conferences and webinars that you’ve never used because you don’t have a magnifying eyeball.
All you need is a pair of eyes to find the disease “fingerprint” under the microscope.
Step 1: Find a diseased plant. You know you have them. For me, it entails picking up a sick-looking plant during a scouting round, shoving it into a bag, quickly labeling it with the location and date, and throwing it in my car. For foliar diseases, splashing some water on the leaves and letting things get foggy in the bag helps spore production.
Leave the bags sitting in a warm place for a day or overnight because likely you don’t have time to get to it immediately anyways and it gives the disease time to happily produce spores.
Step 2: There are a couple ways to get the spores under the lens from the plant, but the easiest method is to use clear cellotape, which you stick onto the diseased plant part, rip off and repeat. Any leaves that come with the tape just peel or tweeze off. Your aim is to have any surface disease structures (or insect eggs, etc.) on the tape, but as little leaf tissue as possible.
Put a drop of clean water on a glass microscope slide and smooth the piece of tape over the top. For root diseases, place a piece of diseased root on the slide with a drop of water, smooth some tape over the top and use your fingernail to crush the root into a thin film.
Step 3: Prepare to get scientific. Put the slide under the lowest magnification, open your eyes and a couple Internet tabs, and search the slide.
Identification
As a grower with some (or tons of) experience, you might already have an idea of what type of disease you’re dealing with. It’s as simple as typing “[disease name] under microscope” into Google and comparing what you’re seeing to what others have already identified.
Or, if you’re completely clueless, first search “visual symptoms + plant name.” With those results, try the “[disease name] under microscope” search to compare the spores under your microscope with the Google images results.
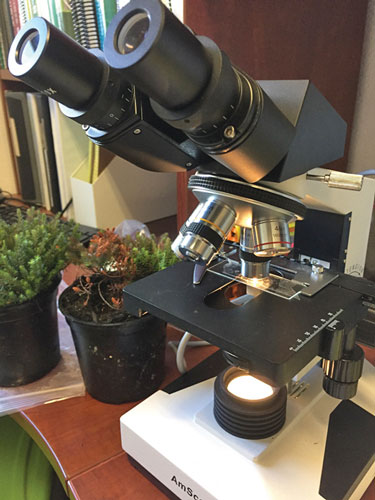
Pictured: Sylvia’s microscope.
Many common diseases are easy to identify and remember, with very distinctive and sometimes humorously shaped structures. (To me, alternaria looks like clubs made of bubble wrap and botrytis looks like a cluster of grapes.)
Using a microscope is straightforward; the one I use has four magnifications ranging from 40 to 1,000X and generally identification is possible at 400X. There are two focusing knobs, but I usually only use the smaller “fine-tuning” one. Adjusting the light intensity can also help sharpen spores. Other than that, it’s as simple as peering down into the contraption and moving the slide around slowly to find things, increasing magnification if needed.
You won’t find only disease; I’ve seen aphids, mites and insect eggs, amoebas and other weird creatures zipping across the slide, fertilizer crystals, nematodes and their eggs, stomata and other plant parts like leaf hairs. (And, of course, lots of air bubbles.)
The Internet is full of useful sites packed with the info you’re looking for—whether it’s the different whitefly egg shapes or the way phomopsis spores light up green as you focus. Although I did take a very good plant pathology course in university, I had to do a lot of Googling to make sure I was diagnosing correctly, and many things I’d never seen before.
If you don’t have the time (or patience), enlist a keen pair of young eyes that are aces at using Google. I had a shadow for a couple days late this fall in the middle of the disease war. She was interested as all get out; she helped me scout, soil sample, apply biologicals, and although she had never used a microscope before, she was the one eyeballing diseases through it like a pro.
And she doesn’t even have her high schooldiploma yet. GT
Sylvia Schaap works in IPM at Qualitree Propagators in British Columbia, Canada, spending free time hiking, hunting, writing and drawing in mountains she now calls home.